Next.jsのサンプルプロジェクトとして登録されているコードを活用して、静的サイトの生成方法(SSG)について動作確認します。その後、Next.jsの主な機能( ルーティングシステム提供コンポーネントビルド時にデータを取得する方法 )について取り上げます。
サンプルプロジェクトを構築して動作確認
プロジェクト構築
( create-next-appコマンド )
Next.jsのプロジェクト構築用に create-next-appコマンド が提供されています。
create-next-app --help で主な利用方法を確認できます。
$ npx create-next-app --help
Usage: create-next-app <project-directory> [options]

Options:
  -V, --version                      output the version number
  --use-npm
  -e, --example [name]|[github-url]

    An example to bootstrap the app with. You can use an example name
    from the official Next.js repo or a GitHub URL. The URL can use
    any branch and/or subdirectory

  --example-path <path-to-example>

    In a rare case, your GitHub URL might contain a branch name with
    a slash (e.g. bug/fix-1) and the path to the example (e.g. foo/bar).
    In this case, you must specify the path to the example separately:
    --example-path foo/bar

  -h, --help                         output usage information
--exampleオプション で https://github.com/vercel/next.js/tree/canary/examplesに登録されているコードをテンプレートとしてプロジェクト構築することができます。
examplesには、以下のようにユースケースに応じた例が多数登録されており、とても参考になります。
- auth0
- i18n-routing
- with-aws-amplify-typescript
- with-electron-typescript
- with-firebase-authentication
- with-material-ui
- with-typescript
ここでは、with-typescriptを利用してプロジェクトを構築してみます。
npx create-next-app my-app-with-typescript --example with-typescriptプロジェクトのフォルダ構造
構築されたプロジェクトのフォルダ構造は以下の通りです。
$ cd my-app-with-typescript
$ tree . -I node_modules --dirsfirst
.
├── components
│   ├── Layout.tsx
│   ├── List.tsx
│   ├── ListDetail.tsx
│   └── ListItem.tsx
├── interfaces
│   └── index.ts
├── pages
│   ├── api
│   │   └── users
│   │       └── index.ts
│   ├── users
│   │   ├── [id].tsx
│   │   └── index.tsx
│   ├── about.tsx
│   └── index.tsx
├── utils
│   └── sample-data.ts
├── README.md
├── next-env.d.ts
├── package.json
├── tsconfig.json
└── yarn.lock
今回インストールされたバージョンは以下の通りです。
$ yarn info next | grep "version:"
  version: '10.0.2',
静的HTMLエクスポート
( nextコマンド outフォルダ )
nextコマンド を利用してNext.jsアプリの起動、ビルド、エクスポートを行います。
以下のように、package.json にnextコマンドが登録されています。
$ cat package.json
{
  (省略)
  "scripts": {
    "dev": "next",
    "build": "next build",
    "start": "next start",
    "type-check": "tsc"
  },
  (省略)
}静的HTMLをエクスポートするには、exportを利用するようなので、buildの箇所を以下のように書き換えます。
"build": "next build && next export",npm run build を実行します。
$ npm run build

> with-typescript@1.0.0 build /tmp/my-app-with-typescript
> next build && next export

info  - Creating an optimized production build
info  - Compiled successfully
info  - Collecting page data
info  - Generating static pages (8/8)
info  - Finalizing page optimization

Page                             Size     First Load JS
┌ ○ /                            334 B          64.4 kB
├ ○ /404                         2.75 kB        63.5 kB
├ ○ /about                       336 B          64.4 kB
├ λ /api/users                   0 B            60.8 kB
├ ● /users                       523 B          64.6 kB
└ ● /users/[id]                  439 B          64.6 kB
    ├ /users/101
    ├ /users/102
    ├ /users/103
    └ /users/104
+ First Load JS shared by all    60.8 kB
  ├ chunks/commons.8eda69.js     12.9 kB
  ├ chunks/framework.1daf1e.js   39.9 kB
  ├ chunks/main.46a55c.js        6.21 kB
  ├ chunks/pages/_app.009788.js  1.01 kB
  └ chunks/webpack.e06743.js     751 B

λ  (Server)  server-side renders at runtime (uses getInitialProps or getServerSideProps)
○  (Static)  automatically rendered as static HTML (uses no initial props)
●  (SSG)     automatically generated as static HTML + JSON (uses getStaticProps)
   (ISR)     incremental static regeneration (uses revalidate in getStaticProps)

info  - using build directory: /tmp/my-app-with-typescript/.next
info  - Copying "static build" directory
info  - No "exportPathMap" found in "next.config.js". Generating map from "./pages"
info  - Launching 15 workers
warn  - Statically exporting a Next.js application via `next export` disables API routes.
This command is meant for static-only hosts, and is not necessary to make your application static.
Pages in your application without server-side data dependencies will be automatically statically exported by `next build`, including pages powered by `getStaticProps`.
Learn more: https://err.sh/vercel/next.js/api-routes-static-export
info  - Exporting (4/4)
Export successful
next build により .nextフォルダ が生成され、next export により outフォルダ が生成されました。
outフォルダ には、以下のように静的HTMLが生成されていました。
$ tree out --dirsfirst
out
├── _next
│   ├── data
│   │   └── mURLYsQ4cyEP_hF7tNasA
│   │       ├── users
│   │       │   ├── 101.json
│   │       │   ├── 102.json
│   │       │   ├── 103.json
│   │       │   └── 104.json
│   │       └── users.json
│   ├── mURLYsQ4cyEP_hF7tNasA
│   └── static
│       ├── chunks
│       │   ├── pages
│       │   │   ├── users
│       │   │   │   └── [id]-de9e8263ed91e03d9216.js
│       │   │   ├── _app-009788a5f5fbb0fb7b65.js
│       │   │   ├── _error-facd0239cf35512da012.js
│       │   │   ├── about-49fb2b7657aa7604faf8.js
│       │   │   ├── index-4e9927485117136be363.js
│       │   │   └── users-1d92de262785ab13001d.js
│       │   ├── 5b30d9b9c58c1a37b1391d221cb4e0f92e92c303.99a0ce3037a0a8889a0a.js
│       │   ├── commons.8eda69c1a2fc3f76953e.js
│       │   ├── framework.1daf1ec1ecf144ee9147.js
│       │   ├── main-46a55c2851774ed72b95.js
│       │   ├── polyfills-fa276ba060a4a8ac7eef.js
│       │   └── webpack-e067438c4cf4ef2ef178.js
│       └── mURLYsQ4cyEP_hF7tNasA
│           ├── _buildManifest.js
│           └── _ssgManifest.js
├── users
│   ├── 101.html
│   ├── 102.html
│   ├── 103.html
│   └── 104.html
├── 404.html
├── about.html
├── index.html
└── users.html
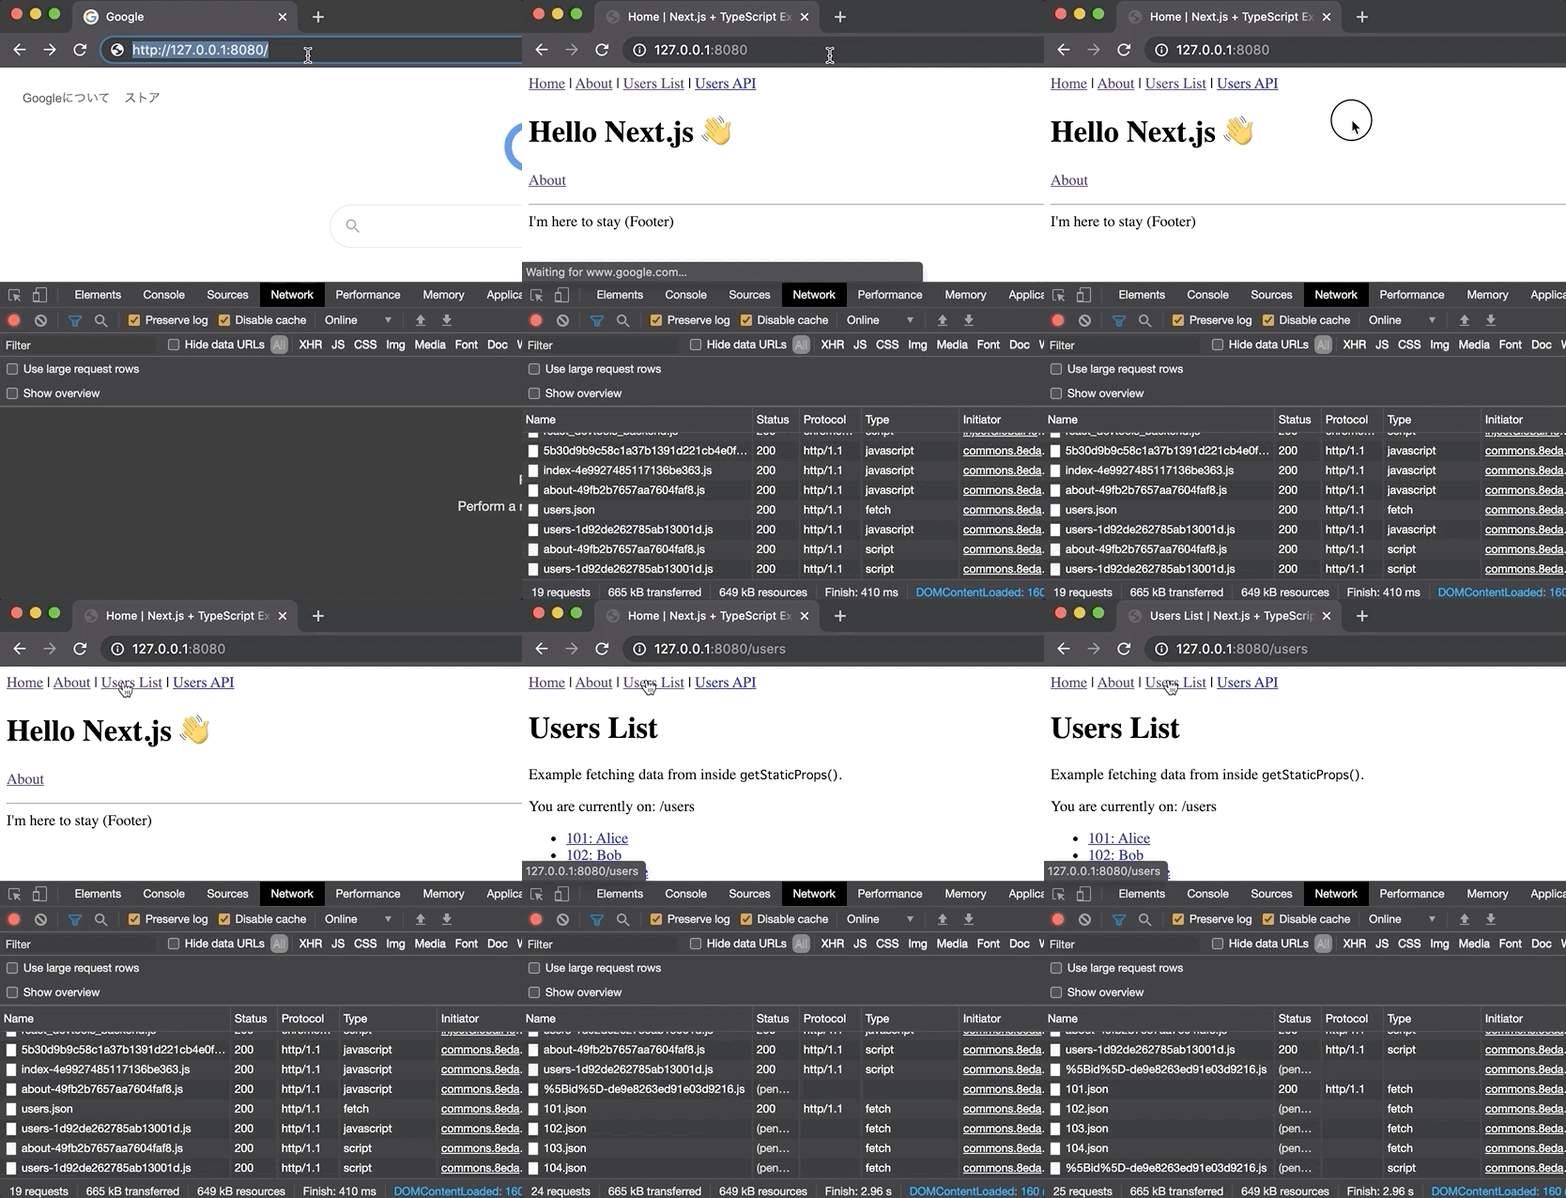
http-serverを利用して動作確認
http-serverを利用すると、生成された静的HTMLの動作確認を手軽にできます。
$ cd out/
$ npx http-server
npx: installed 23 in 1.634s
Starting up http-server, serving ./
Available on:
  http://127.0.0.1:8080
  http://10.0.1.6:8080
Hit CTRL-C to stop the server
http://127.0.0.1:8080にアクセスして動作確認できます。
Next.jsの主な機能を確認
Next.jsの主な機能について取り上げます。
ルーティング設定
( ページベースのルーティングシステム )
Reactのルーティングといえば React Routerが有名ですが、Next.jsの場合、ページベースのルーティングシステム を提供しているので、React Routerは不要です。
以下のように、pagesディレクトリ配下 にファイルを追加することで、自動でルーティングしてくれます。
pages/
├── posts/
│   └── [id].js  //  `/posts/1` や `/posts/2` のルーティングでアクセス(Dynamic Routes機能)
└── about.js // `/about` のルーティングでアクセス「_app.js」 「_document.js」 「404.js」 など特殊なルールで機能するファイルも存在して、必要に応じて活用します。
pages/
├── posts/
│   └── [id].js
├── _app.js      // すべてのページに共通するトップレベルのコンポーネントであり、グローバルCSSを導入したいときなどに活用
├── _document.js // htmlタグとbodyタグを拡張したいときに活用
├── 404.js       // カスタム404ページ
└── about.jsなお、イメージファイルなどのスタティックファイルについては、publicディレクトリ配下 に格納することでアクセスできます。
├── pages/
└── public/
    └── favicon.ico
便利なコンポーエントを提供
( Link Head Image … )
以下、Next.jsで提供しているコンポーネントです。
- Linkコンポーネント
- サイト内ページ遷移を実装するとき利用します。
aタグだけだと全て再取得になりますが、Linkを利用することで遷移先ページに必要なリソースだけ取得されます。- また、バックグラウンドでの自動プリフェッチ機能なども備わっています。
- Headコンポーネント
titleタグやmetaタグなどheadタグ内に入れたい内容を設定できます。
- Imageコンポーネント
- Next.js 10で提供されるようになりました。
- 画像最適化を行ってくれます。
ビルド時にデータを取得する方法
( getStaticPaths getStaticProps )
先述した動作確認にて、next build && next export の実行によって、pages/users/[id].tsx のファイルをもとに下記ファイルが生成されました。
out/users/101.htmlout/users/102.htmlout/users/103.htmlout/users/104.html
pages/users/[id].tsxの中身を確認すると2つの関数( getStaticPaths getStaticProps )が export されています。この関数により、ビルド時にデータが取得されます。
- getStaticPaths
- 生成するべきURLを決めるのに活用します。
pages/users/[id].tsxの動的パラメータ部分を[id]を列挙します。
- getStaticProps
- ビルド時、必要なデータを取得するのに活用します。
- データは、ページコンポーネントのpropsに渡されます。
設定ファイル
( next.config.js )
今回の動作確認では利用しませんでしたが、next.config.jsというファイルでビルド設定などカスタマイズできるようです。


